
Deploy a Serverless CI/CD Pipeline on the Google Cloud Platform
Cloud Run is a service on Google Cloud that lets you build reliable and scalable web-based applications. Developers can now get very close to being able to just write their code and push it, and then let the service deploy, run and scale their application for them.
In this short guide, I’m going to show you how by combining Cloud Run, Cloud Build and Cloud Source Repositories, we can build a simple, serverless CI/CD pipeline that automatically deploys an app whenever new commits are pushed. This guide assumes you have a basic knowledge of GCP and that you have the Google Cloud SDK installed and are familiar with basic gcloud commands.
In the background, we will deploy all of the required resources using Terraform. You can find the example code used in this guide on my GitHub. First, let’s have a look at the architecture and the steps involved in building it.
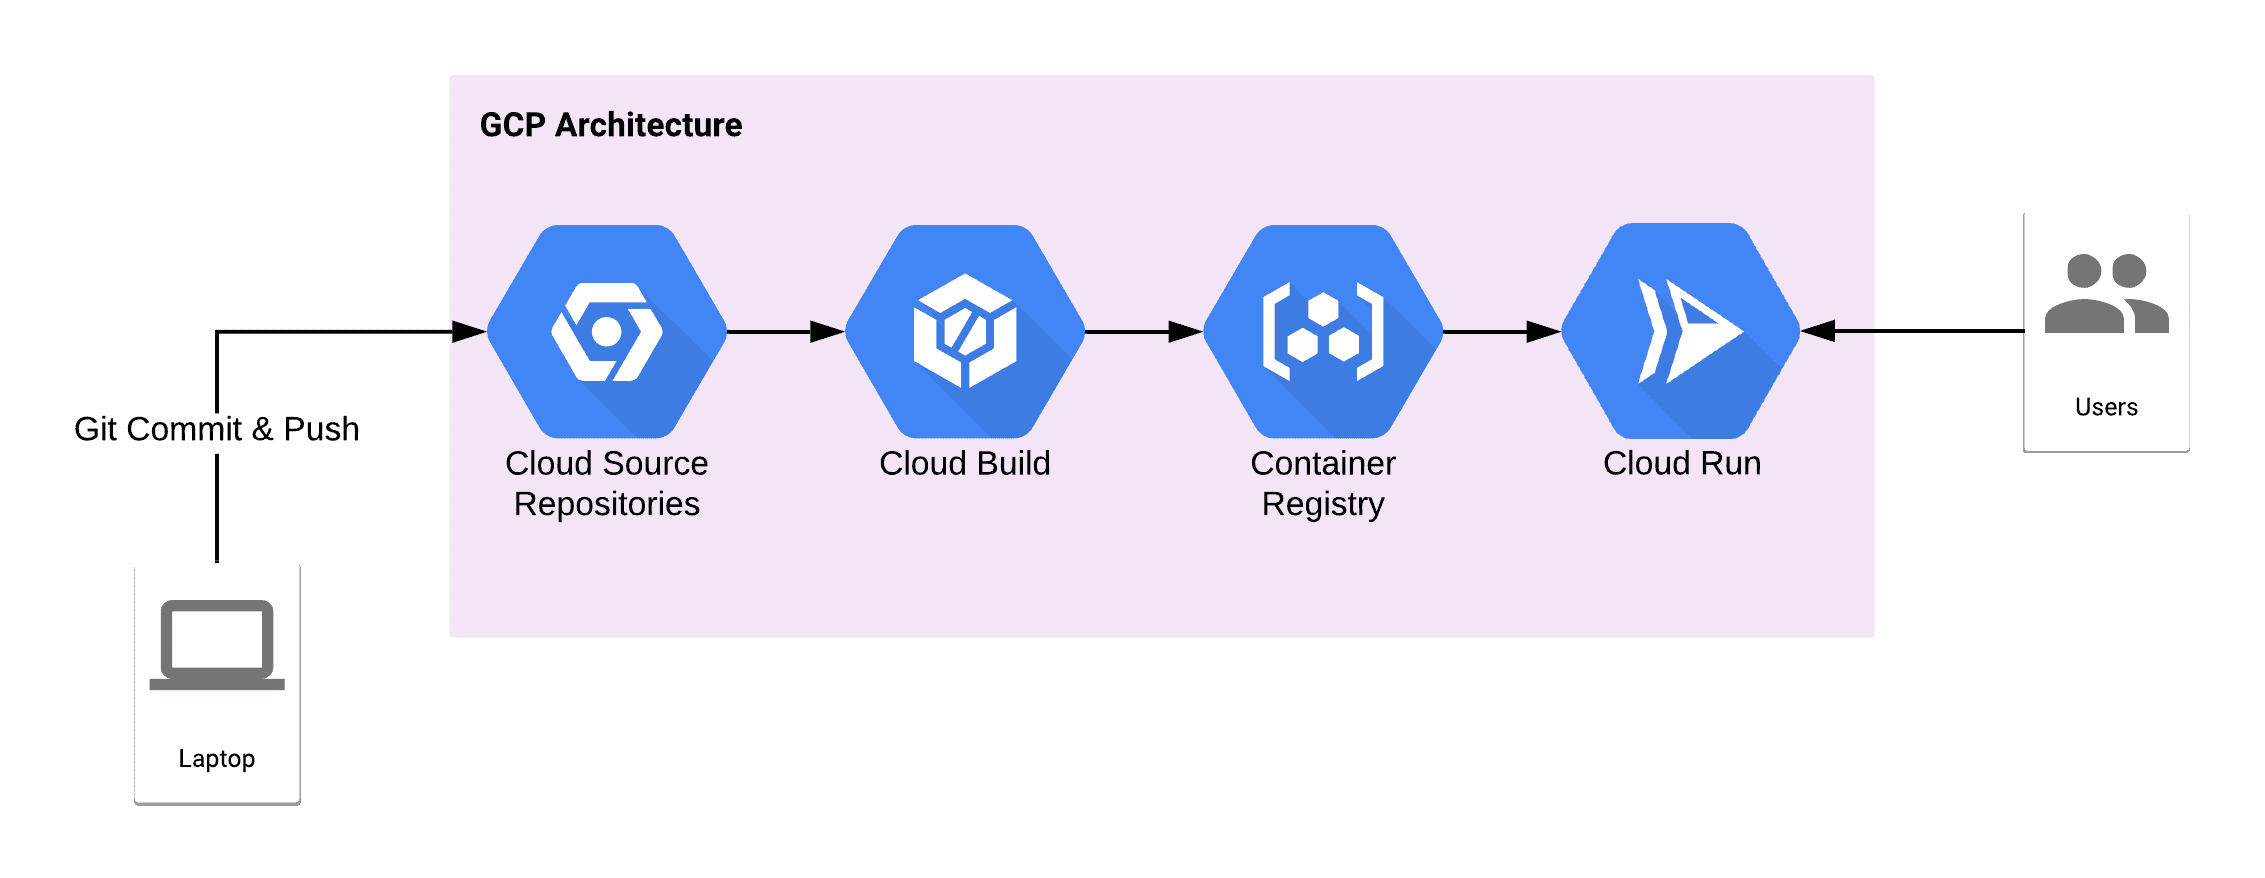
Overview
I’ve broken this guide down into the following steps:
- Installing the necessary tools
- Create a new project
- Enable the appropriate permissions
- Grant Cloud Build Permissions
- Create DB password in Secrets Manager
- Download json credentials
- Create bucket for terraform state
- Initial container build
- Edit terraform files
- Running Terraform to deploy the resources
- Making changes to our app
- Viewing the app
- Cleaning up afterward
- Next steps
Installing the necessary tools
In order to complete this guide, you’ll need to install most of following tools:
Terraform: This guide uses Terraform to deploy the resources and manage all the infrastructure as code.
Docker: Docker is required for local development and to push Docker images to Google Container Registry.
Git: Git is used to clone the example code and trigger new deployments.
GCP: You will need a GCP account with billing enabled. There is a free tier that includes $300 of free credit over a 12 month period. You will also need to install the gcloud command-line tool.
Visual Studio: This is required for the blazorshop code
Visual Studio Code(OPTIONAL): This is an optional tool to edit the terraform files
Create a new project
For details of how to create a project please look here. In my example I have called this atos-cloudrun-demo
Enable the appropriate permissions
This guide requires certain permissions to be configured correctly for the CI/CD pipeline to work. To make life easier I’ve put together a small shell script that can do this for you automatically. This script will automatically enable the following APIs:
- cloudresourcemanager.googleapis.com
- cloudbuild.googleapis.com
- containerregistry.googleapis.com
- cloudrun.googleapis.com
- sqladmin.googleapis.com
- storage.googleapis.com
- sourcerepo.googleapis.com
- secretmanager.googleapis.com
Then it will add certain IAM policy bindings so Cloud Build and Cloud Run can work correctly.
Go to the GCP console and open cloud shell, create a temp folder to work with and then using the bash cd command make sure your current directory is this new folder
Then, let’s execute the script
$ git clone https://github.com/devopswithdave/terraform-gcp-cloudrun.git
$ cd terraform-gcp-cloudrun/bin
$ chmod 777 set-blazorshop-perms.sh
$ ./set-blazorshop-perms.sh
Grant Cloud Build Permissions
Next we need to ensure Cloud Build has the appropriate permissions to deploy to the Cloud Run service. Visit the Cloud Build settings page. In the Service account permissions panel, set the status of the Cloud Run Admin role to Enabled.
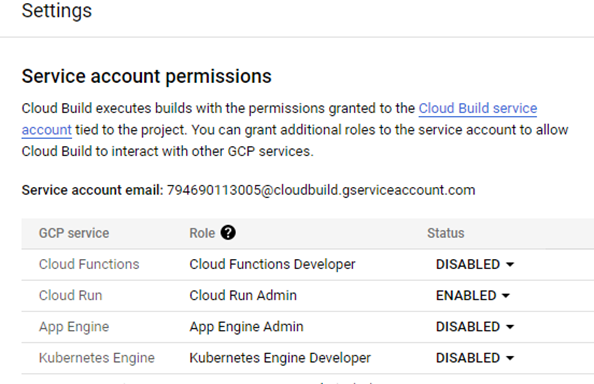
If the GCP console opens a popup window saying that there may be additional steps required (as below) press the ‘SKIP’ button
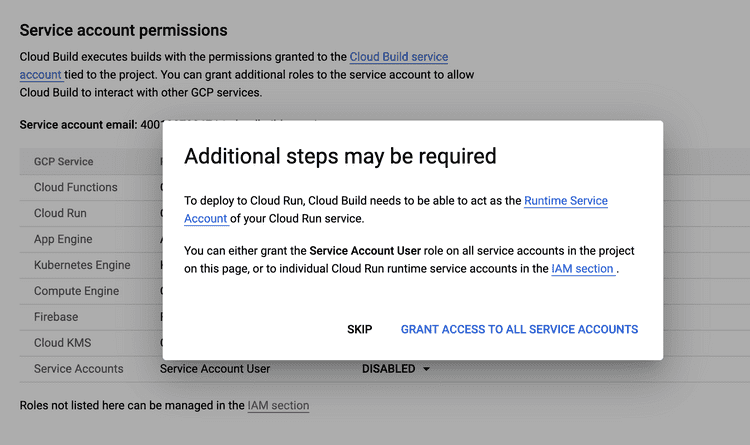
The following Google Cloud Build page has more information on the required permissions.
Create DB password in Secrets Manager
Our demo code uses a MySQL server database to store the persistent data. For this we need some database credentials including a password. We don’t want to store this sensitive piece of information in our terraform scripts as these will be visible from our github repo. We are going to store our password in GCP’s Secret Manager
Go into Secret Manager and create a new secret called blazordb-password. If you choose to call this something else then you will need the name of this secret for our terraform variables file shortly

Download json credentials
To allow terrafrom to be able to create our resources we need to provide it with some credentials in the form of a credentials key. Go to IAM and find the service account - [PROJECT NUM]-compute@developer.gserviceaccount.

Select Actions – manage keys
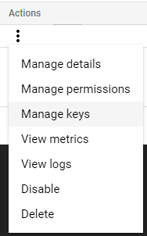
Then choose

Choose to create a json key
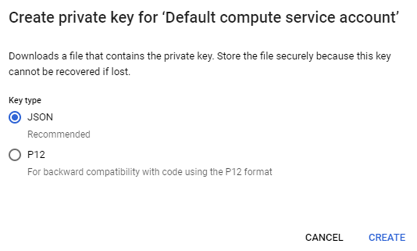
This will download a .json file to your local PC You will need to know the location of this for the next step
We need to add this key to the environment variable - GOOGLE_APPLICATION_CREDENTIALS

Then in the CLI or VS Code terminal (wherever you usually run gcloud)
gcloud config set project atos-cloudrun-demo
Create bucket for terraform state
The next step is to create a bucket to store our terraform state, you can call it what you like but I am calling mine atos-cloudrun-demo-tf
gsutil mb -c standard -l europe-west2 gs://atos-cloudrun-demo-tf
You will need the name of this bucket for our terraform variables file shortly
Initial container build
I have chosen to perform an initial build of the code prior to creating the resources. This will upload it into the container registry. If you want to do this then you will need to get a copy of the example code from github, download and extract to your PC.
Then use a CMD window to navigate to this location - specifically to where the Dockerfile is located.
In the CLI (wherever you run gcloud) make sure you are in the folder containing the Docker file and run
gcloud builds submit --tag gcr.io/$PROJECT/blazorshop
where $PROJECT is the name of the project you created earlier
For my example the code is:
gcloud builds submit --tag gcr.io/atos-cloudrun-demo/blazorshop
Edit terraform files
Next you will need the terraform code from my github repository. If you haven’t already, you should clone the following repository containing the example code, then switch to the terraform-gcp-cloudrun directory or download the code to your local machine and open the terraform project in VS Code and go to a terminal window:-
$ git clone https://github.com/devopswithdave/terraform-gcp-cloudrun.git
$ cd terraform-gcp-cloudrun
The application code we are using uses a MySQL Database backend. The connection string is made up from environment variables that will be injected into the docker container. These are:-
- INSTANCE_CONNECTION_NAME
- DBHOST
- DBNAME
- DBUSER
- DBPASSWORD
The DBPASSWORD is taken from the secret manager but the rest of the variables need to be provided by the user in the variables.tf file
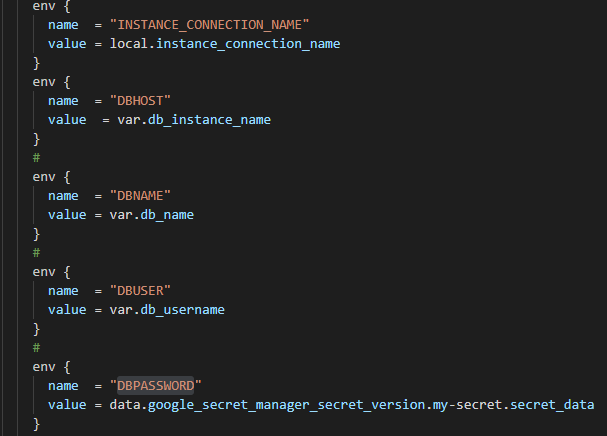
These are all the variables that will need editing in the variables.tf file:-
- service_name - name of the Cloud Run service
- image_name - name of the docker image stored in GCR
- db_instance_name - used to create DBHOST environment variable
- db_name - used to create DBNAME environment variable
- db_username - used to create DBUSER environment variable
The following value will need editing in the terraform.tfvars file:-
- project
The following section will need editing in the main.tf file:-
terraform {
  backend "gcs" {
    bucket = "<bucket-name>"
    prefix = "tf-state"

   }
}
The bucket-name should be the name of the bucket you created in the earlier step
Running Terraform to deploy the resources
Now we can use Terraform to deploy all of the necessary resources. Simply run the following commands
terraform init -reconfigure
terraform plan
terraform apply
Terraform will then deploy all of the necessary resources for our pipeline including a Cloud Run service, Git repository, MYSQL database and a Cloud Build trigger. This step will take approximately 3-4 minutes to complete. After Terraform has completed, you will see some output similar to the following:

You can test the sample application by opening the URL in your browser:
$ open $(terraform output url)
You should see something similar to the following:
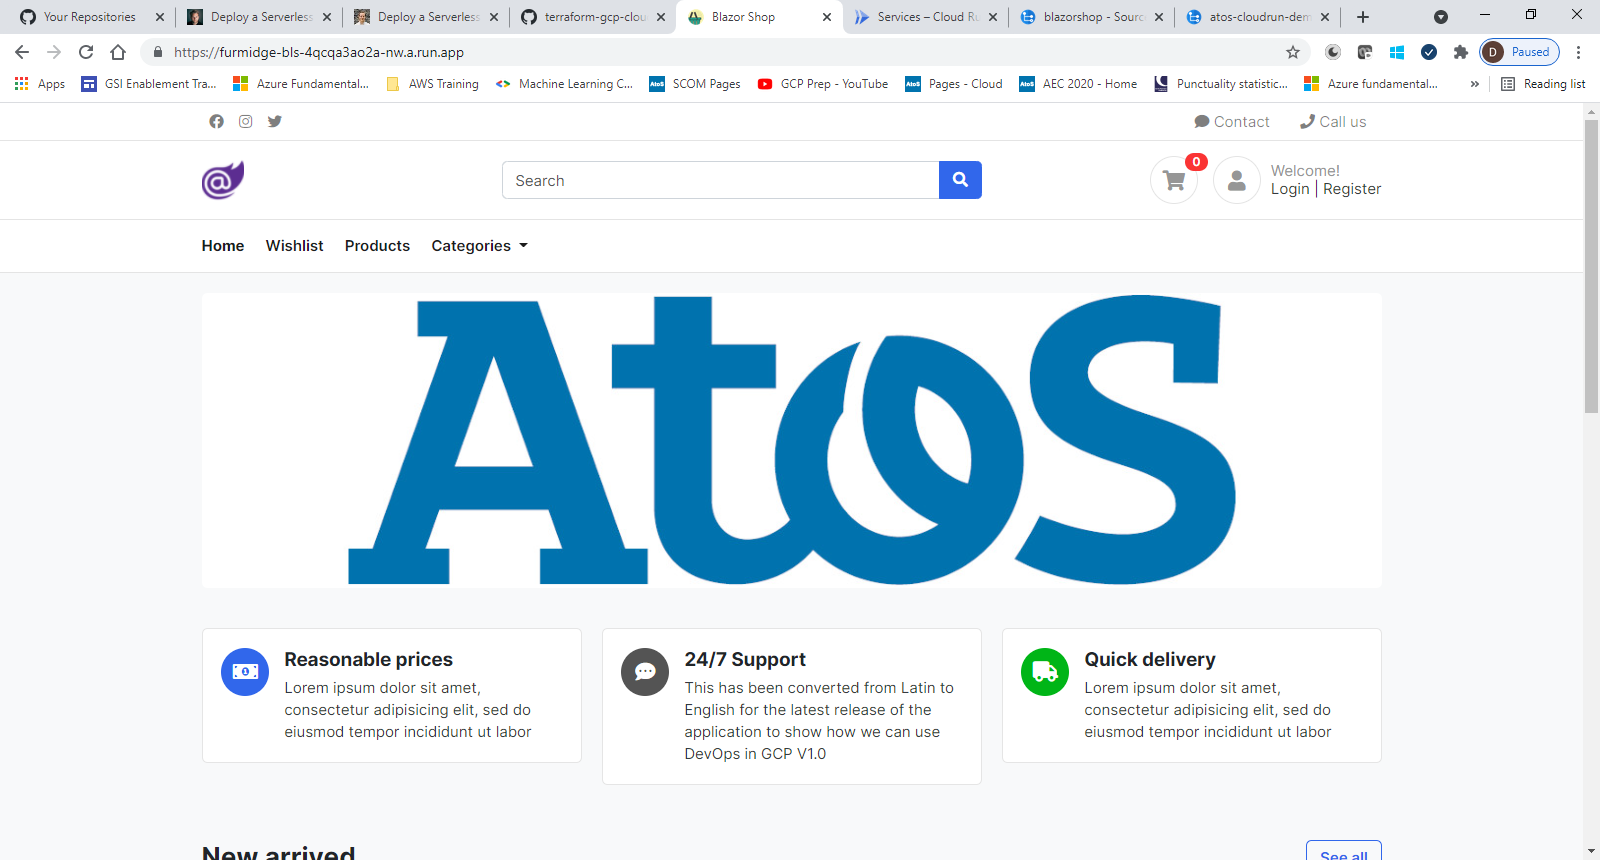
Take the time to login to the GCP console and look at the following services to see what has been deployed.
Making changes to our app
Now that we have successfully managed to create our infrastructure we are ready to start the CI/CD part of the guide. We want to make a change to our application and automatically deploy it to our website. First we need to upload the blazorshop source code into our new repo in GCP.
Open a command prompt and go to the blazorshop source code you downloaded earlier. Location should look like this:-
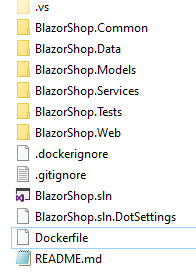
If there is a .git folder then you will need to delete it.
From the command prompt you will need to enter the following commands(replace $PROJECT and $REPO to match your environment):-
git init
git remote add origin https://source.developers.google.com/p/$PROJECT/r/$REPO
git add .
git commit -m "initial release"
git push -u origin master
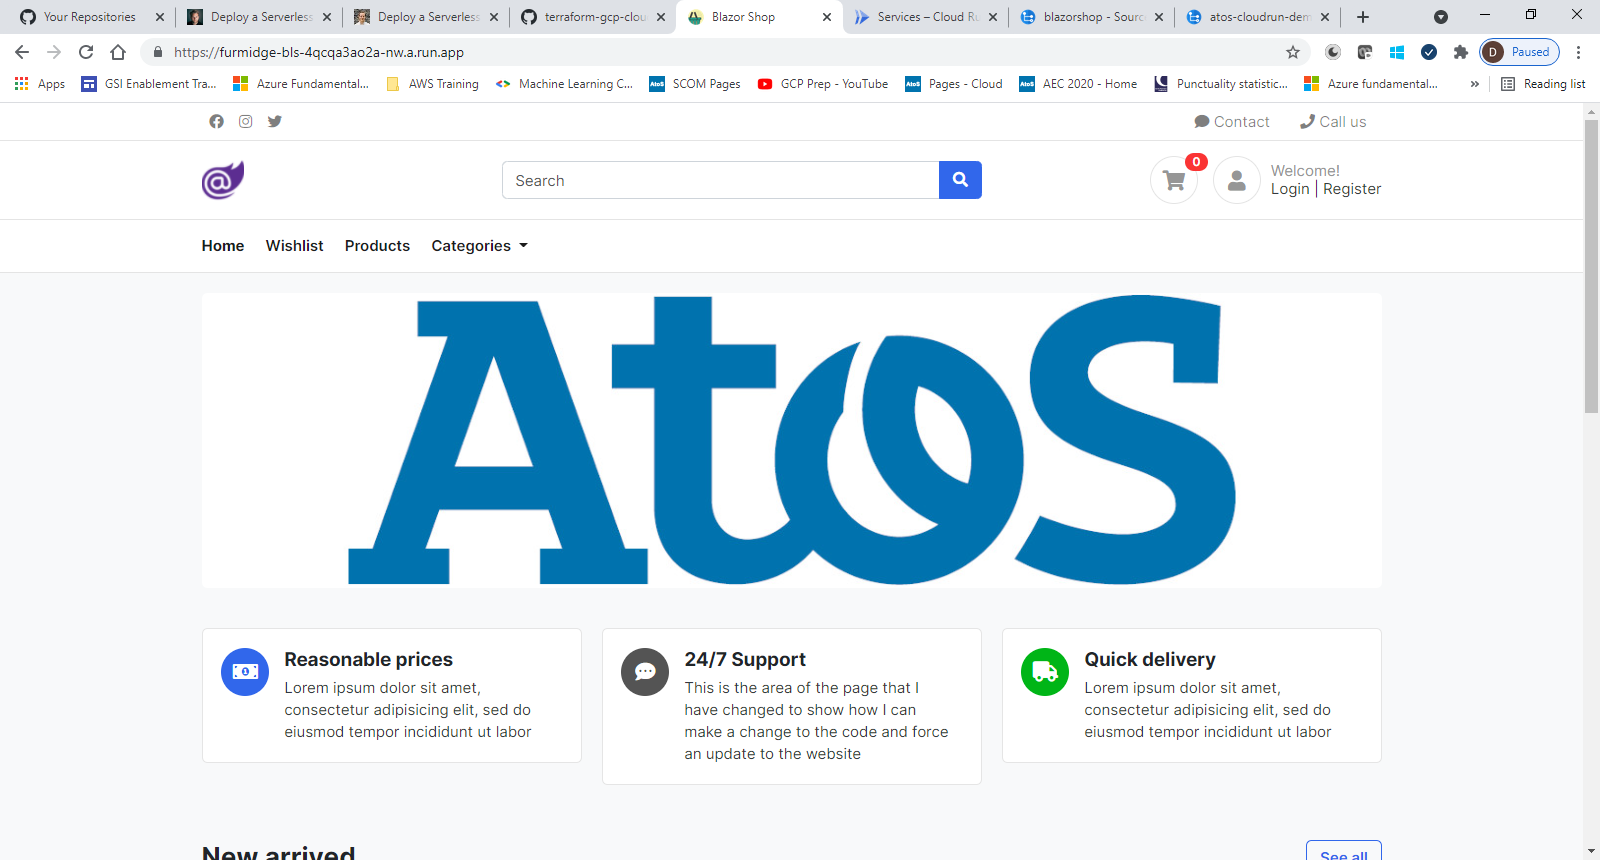
Open the solution in Visual Studio and make a change to the homepage (BlazorShop.Web\Client\Pages\index.razor), save the change and push to the git repo. If you want to monitor the change you can go to Cloud Build and watch our trigger run and then go into Cloud Run and see the new image being deployed.
Viewing the app
After a few minutes, refresh the website or use the command from earlier
$ open $(terraform output url)
You should see the changes that you made in Visual Studio
Cleaning up afterward
Even though Cloud Run is very cheap to run your apps, we can easily clean up using the Terraform destroy command:
$ terraform destroy
After a few minutes, Terraform will undeploy the app and destroy all of the resources we’ve created.
Next steps
This guide gave an example of how to deploy a simple CI/CD pipeline using serverless technologies. Under the hood, Cloud Run is built on top of an open standard - Knative which you should read more about.
If you have any questions you can reach out to me on LinkedIn